Fcmila Wi-Fi Smart Bulb in ioBroker einbinden
-
Hallo,
ich hatte die Sonoff B1 Glühbirne in China bestellt und wollte diese mit Tasmota flashen. Leider wurde mir statt der Sonoff B1 Glühbirne die Fcmila Smart Bulb zugeschickt.
Hat jemand von Euch diese in ioBroker zum Laufen bekommen? Man kann die Glühbirne mit der "Smart Life" App nutzen.
!

VG
-
Du bist wohl nicht der einizige, dem diese Lampe anstatt der B1 geschickt wurde :lol:
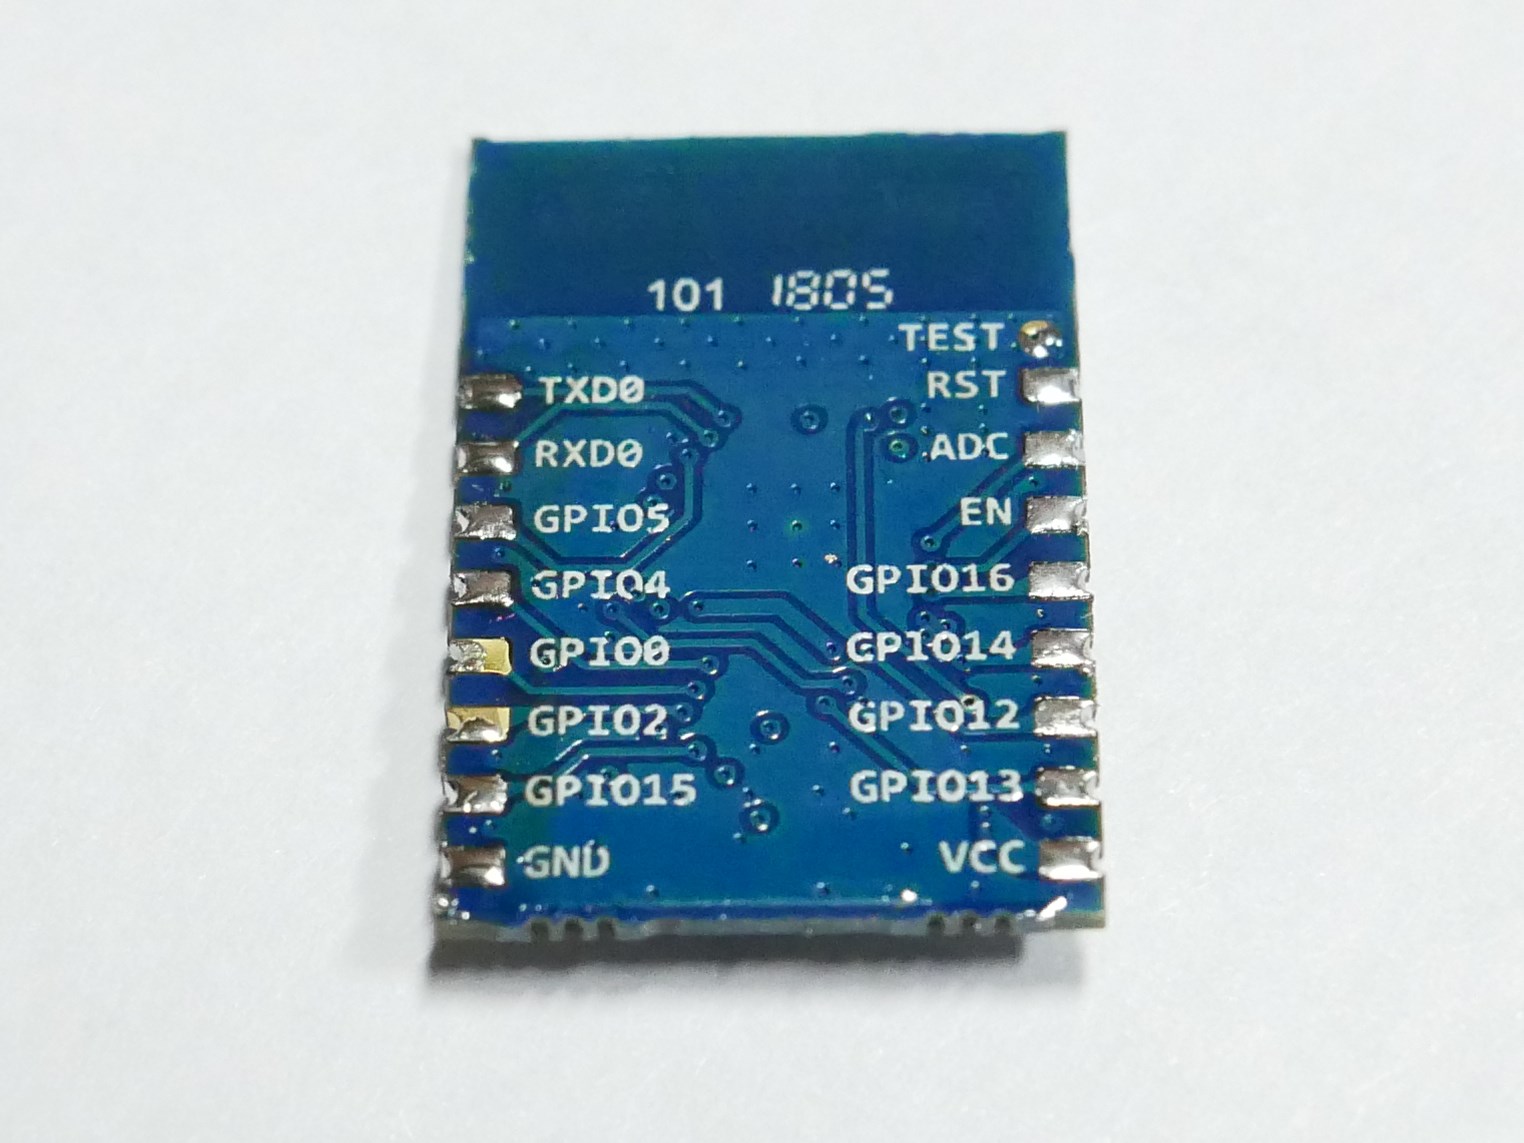
Sucht man nach dem Aufdruck TYWE3S auf der senkrecht herausstehenden Platine findet man heraus, das auch ein ESP8266 verbaut ist, gleich wie in der B1:
https://docs.tuya.com/en/hardware/WiFi- … odule.html
https://github.com/arendst/Sonoff-Tasmota/wiki/TYWE3S
Daher wohl auch der Versuch des Verhäufers diese Lampe als B1 loszuwerden, ohne auf den Gedanken zu kommen, das das Aufspielen einer alternitiven Firmware hier nicht so einfach möglich ist.
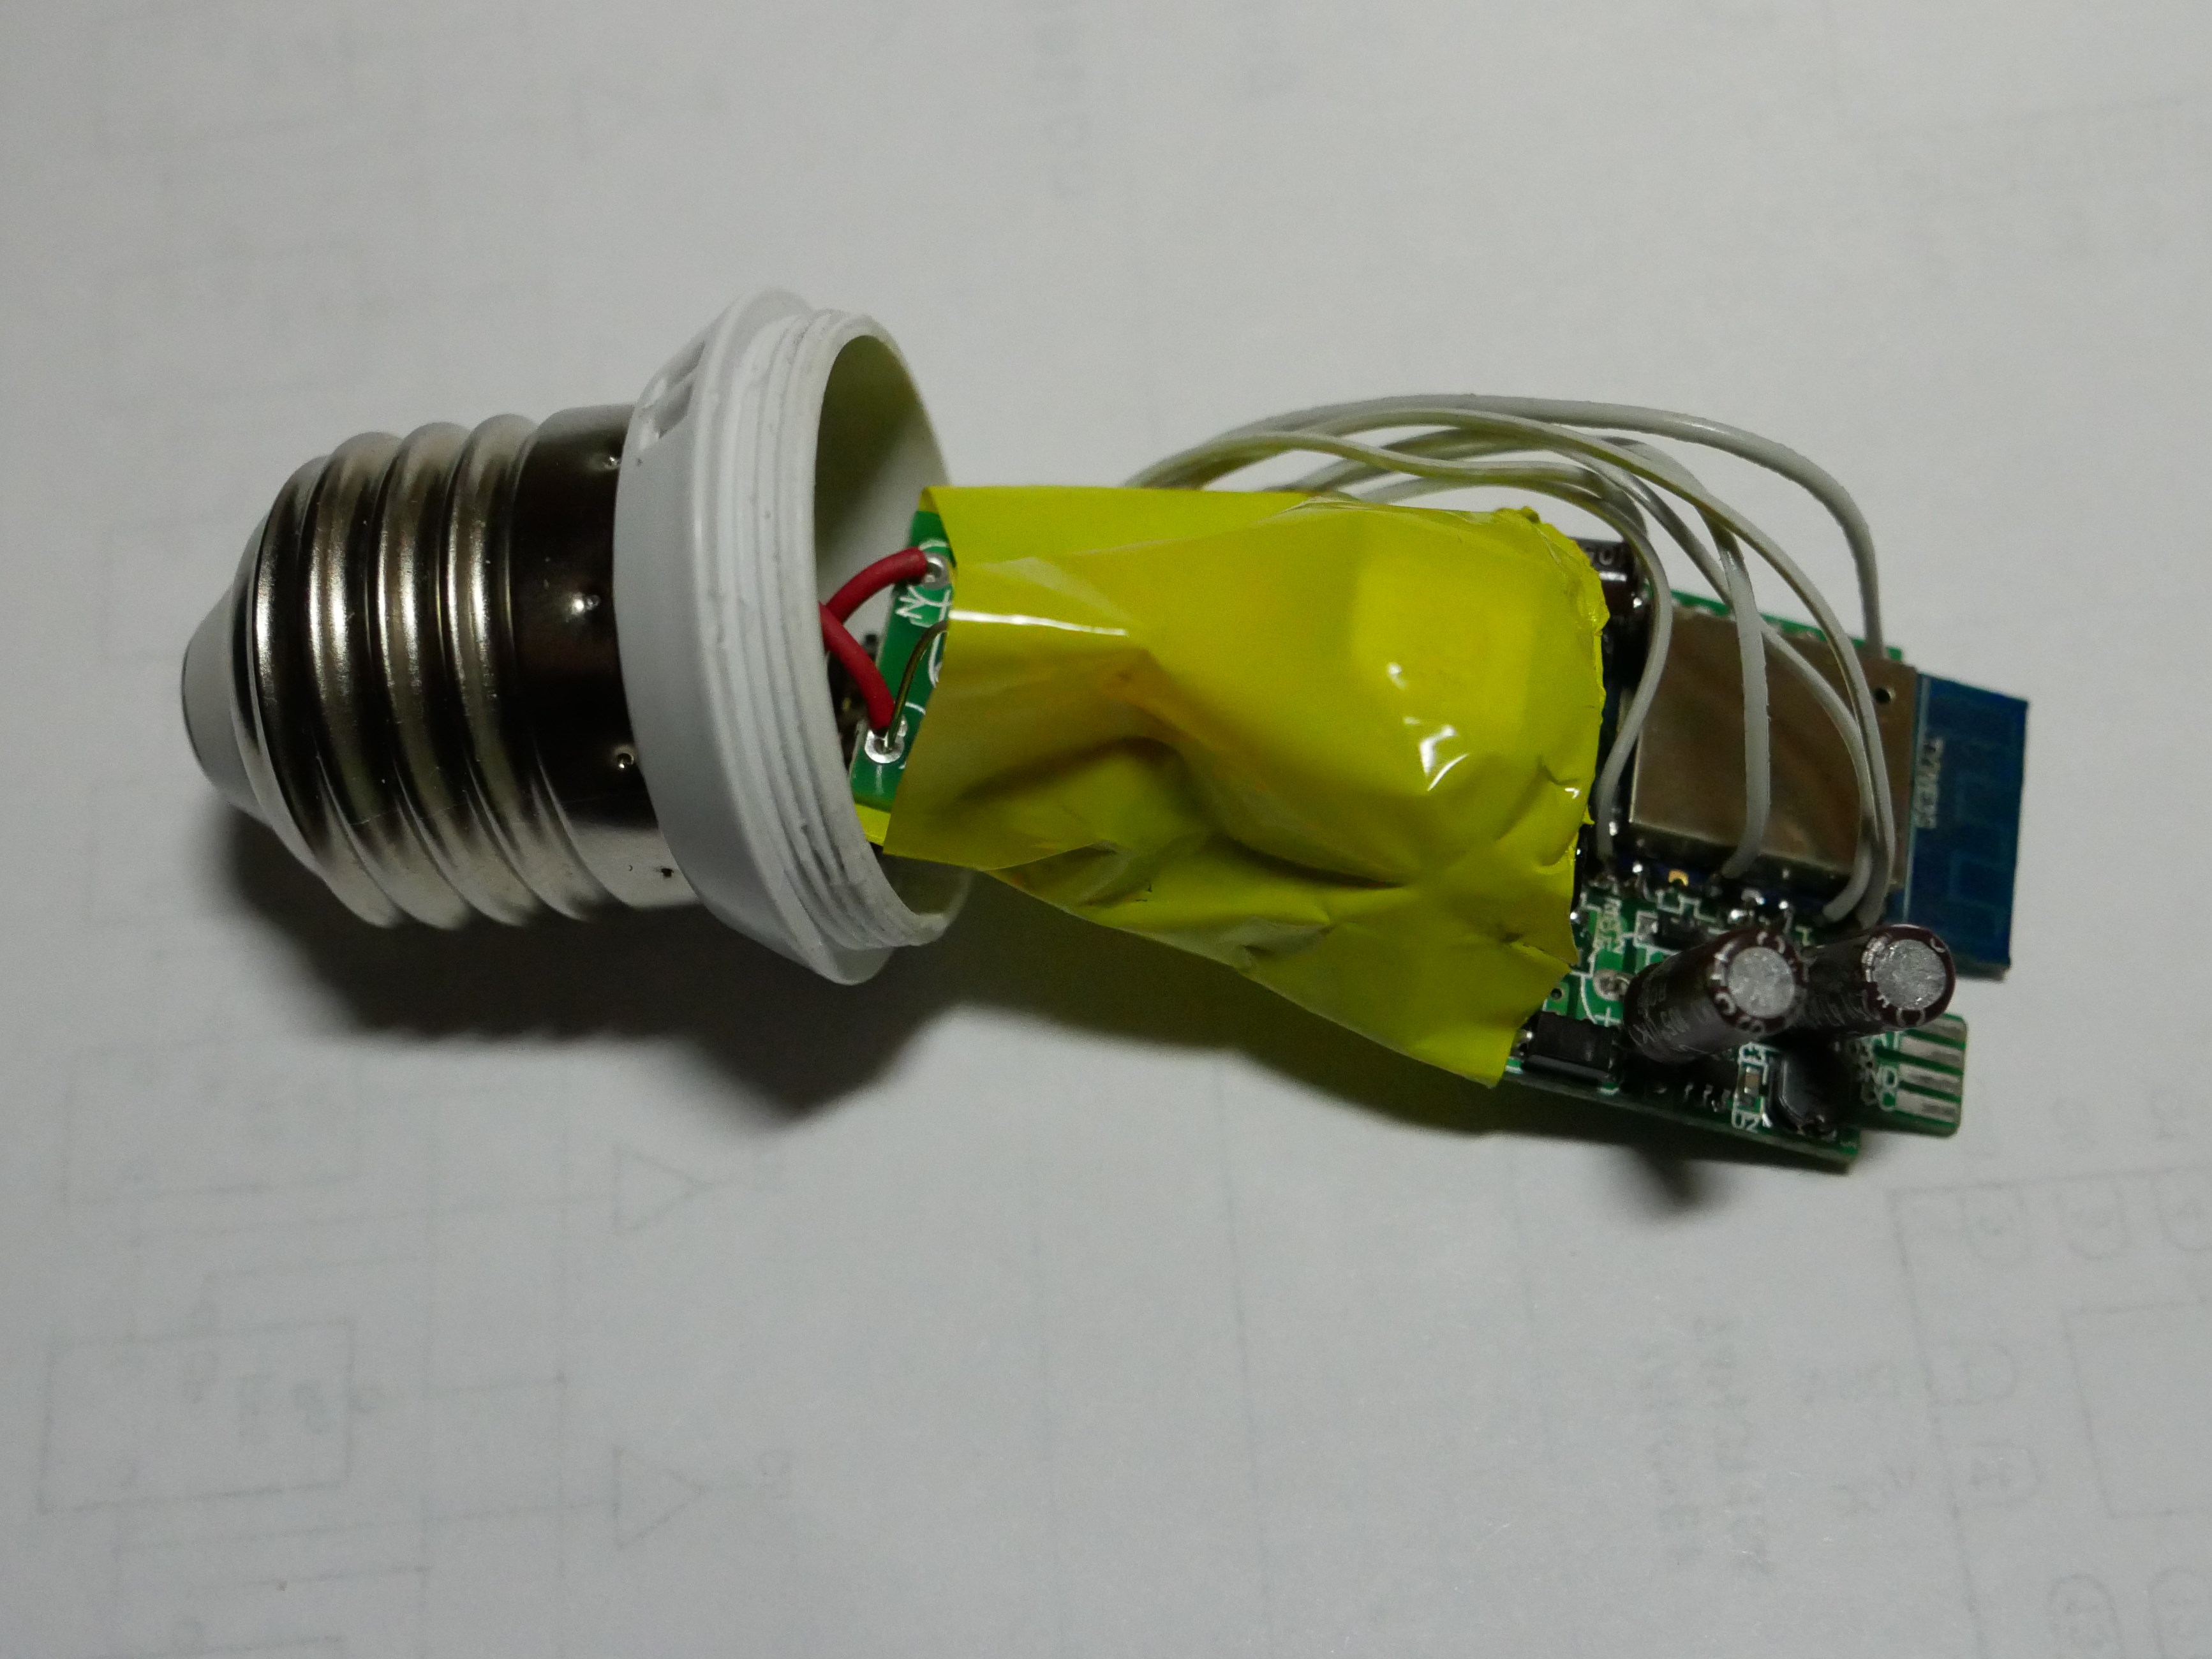
Leider ist die obere Platine mit einer Silikonartigen Paste eingeklebt, wodurch es mir bisher unmöglich war diese zerstörungsfrei aus dem Gehäuse zu bekommen. Stundenlanges bestreichen der Klebenaht mit Silikonentferner, Aceton, Nitroverdünnung als auch das Erwärmen der Leiterplatte auf ca 100°C blieben leider alles ohne Erfolg.
Vielleicht hat jemand noch eine andere Idee wie man die Platine herausbekommt, ohne das Gehäuse zu zersägen?
Würde mich auch bereit erklären, alternative Firmware falls notwendig anzupassen, wenns denn erstmal sauber zerlegt wäre…
-
Hello, got here by googling wtf is this bulb I got send, instead of sonoff b1. So I got here and used translate to see what you guys are talking about. Excuse my use of english, I think it's better than translating my text to german and copying it here
")
Anyway, after sending angry letter to seller to see how much money they will give back to me, i looked how to get into it. Same reason – to upload different program on it. Tasmota for example.
Here's how you get into it:
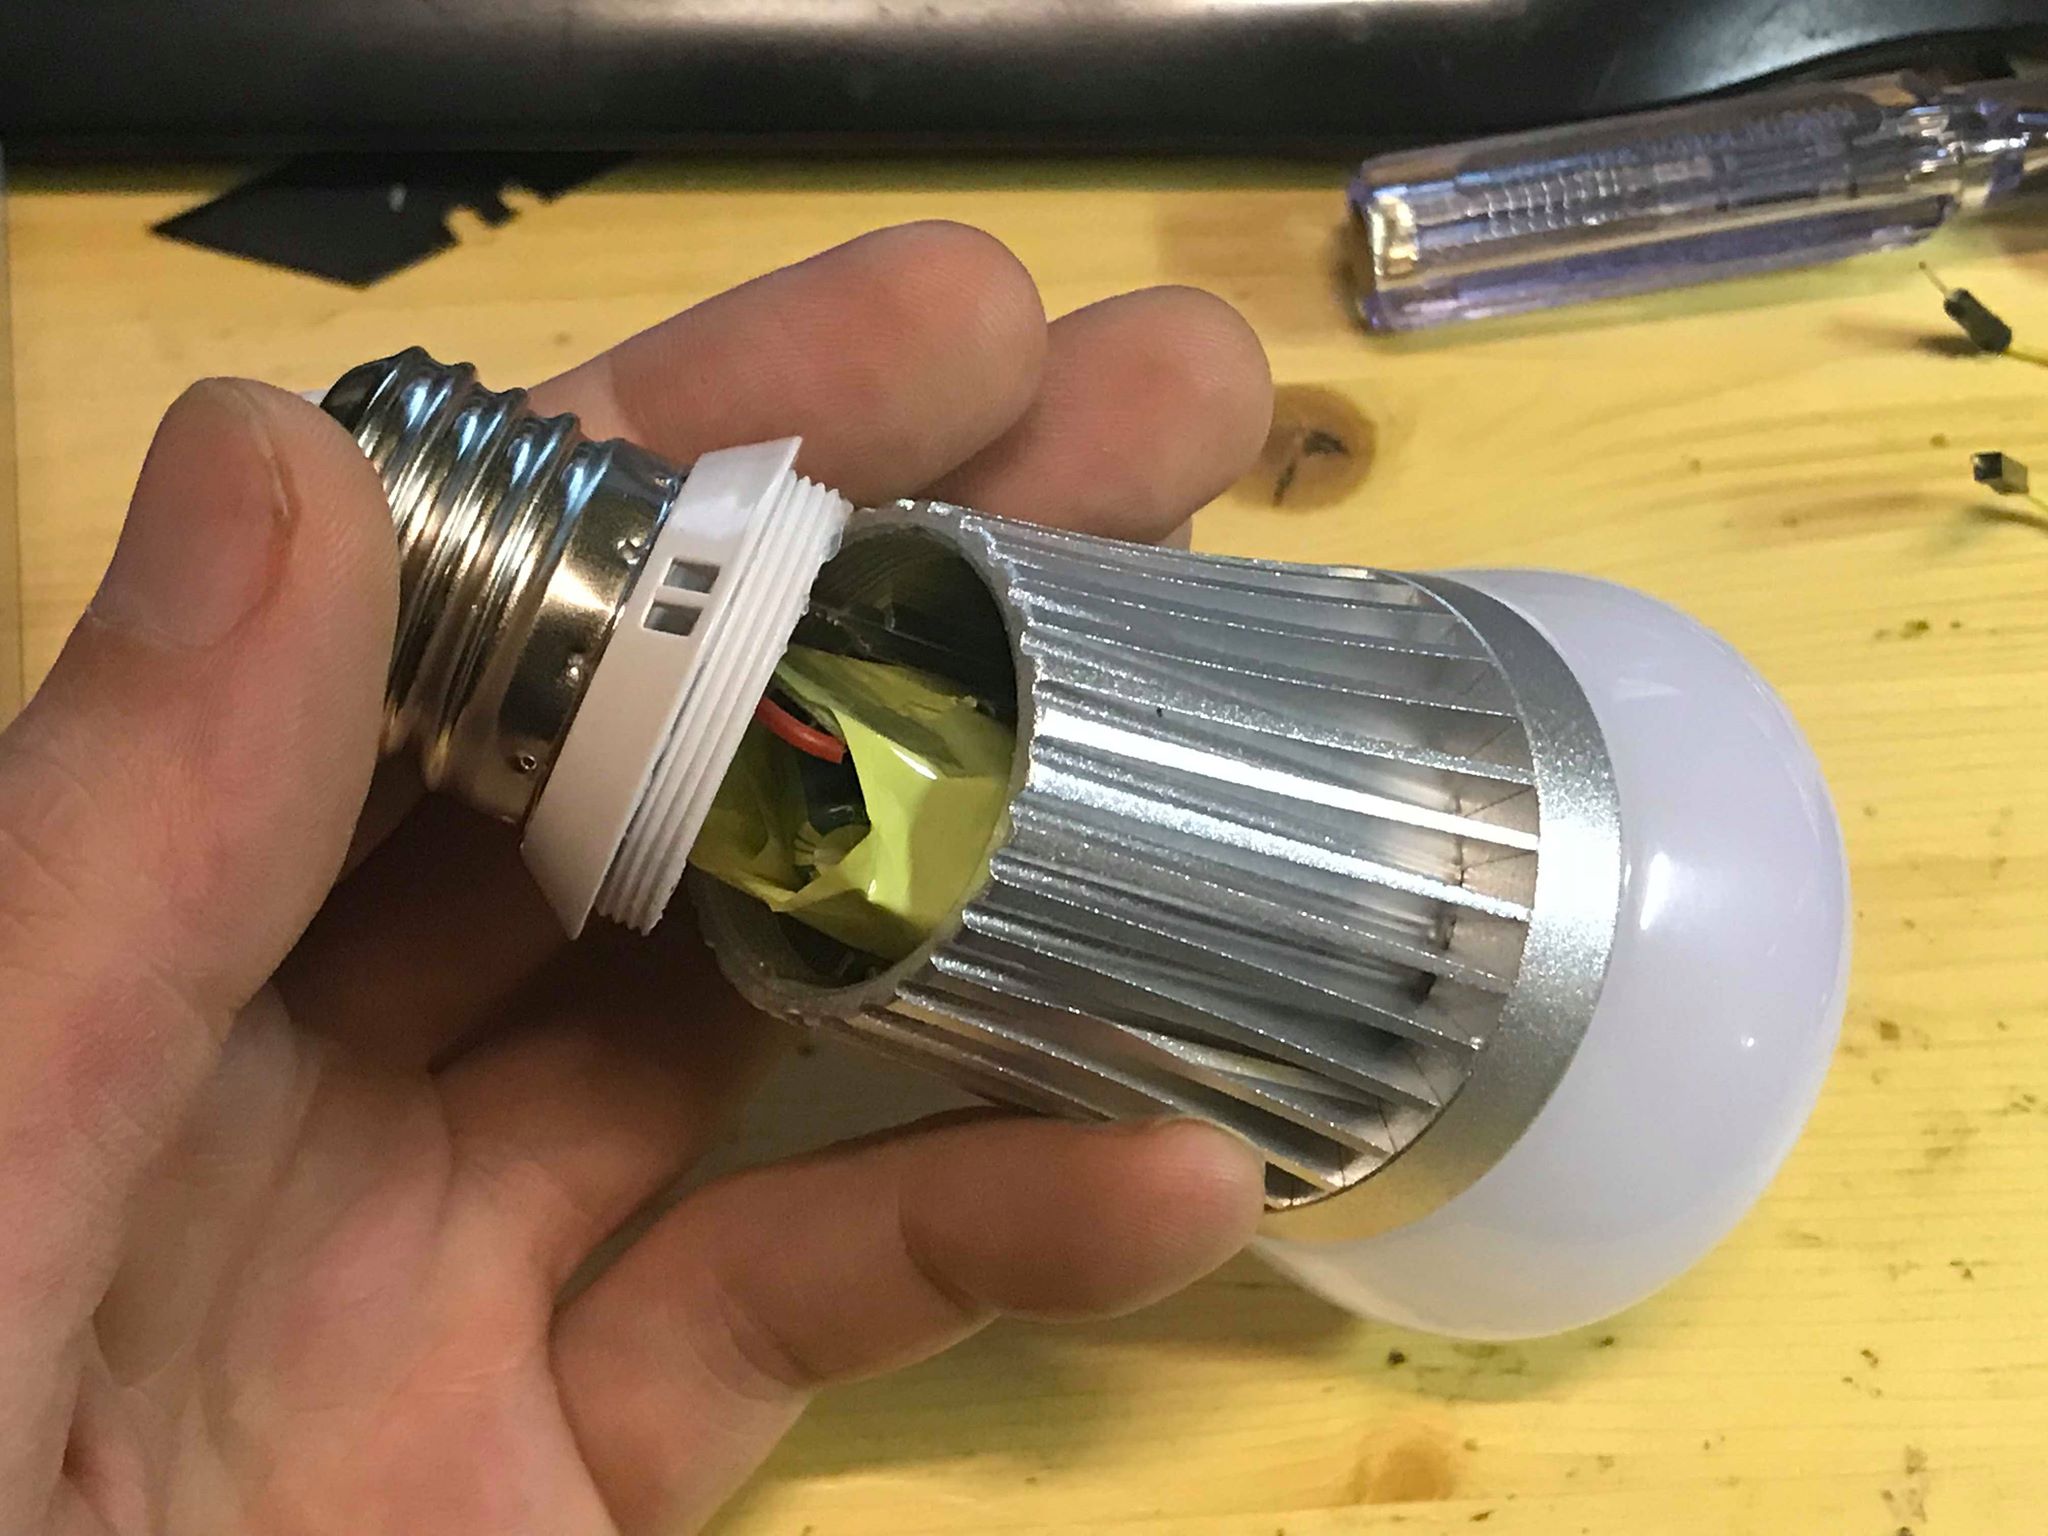
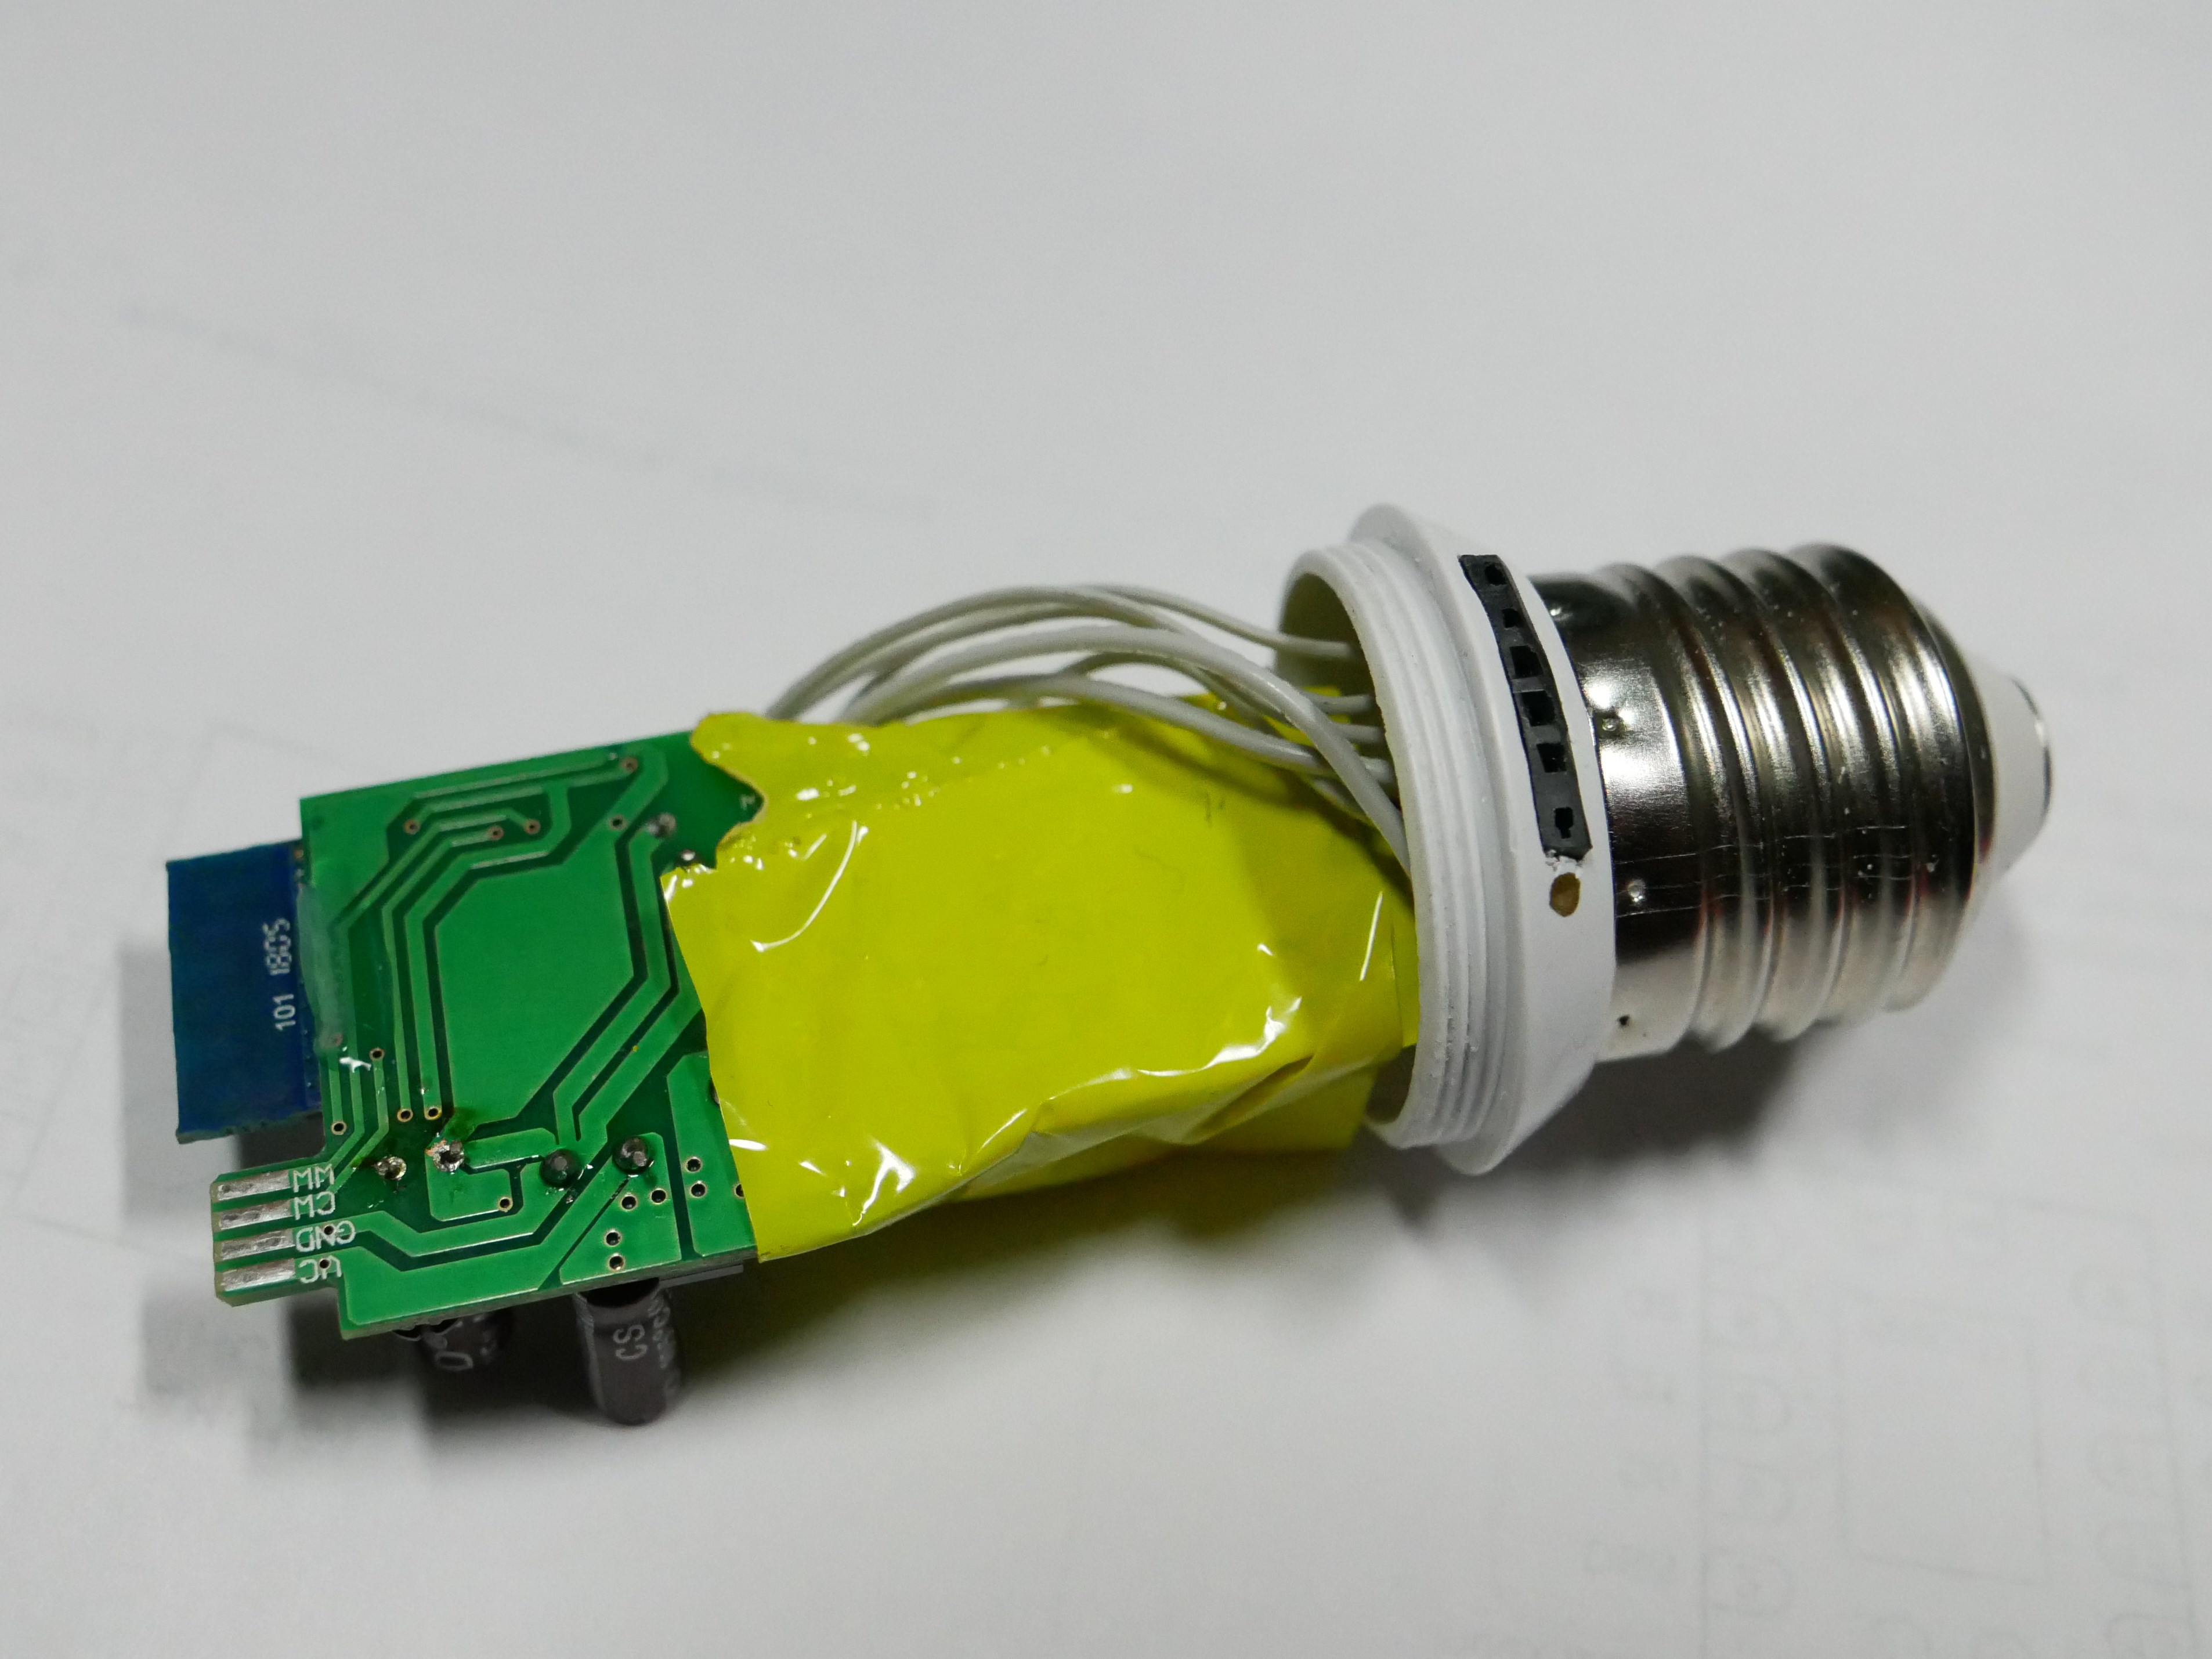
It has twist threads on the back, do it slowly, if you break the wire, well you can solder on a bit longer one later. Mine didnt break, had enough room to twist.And here's how you get to the board:
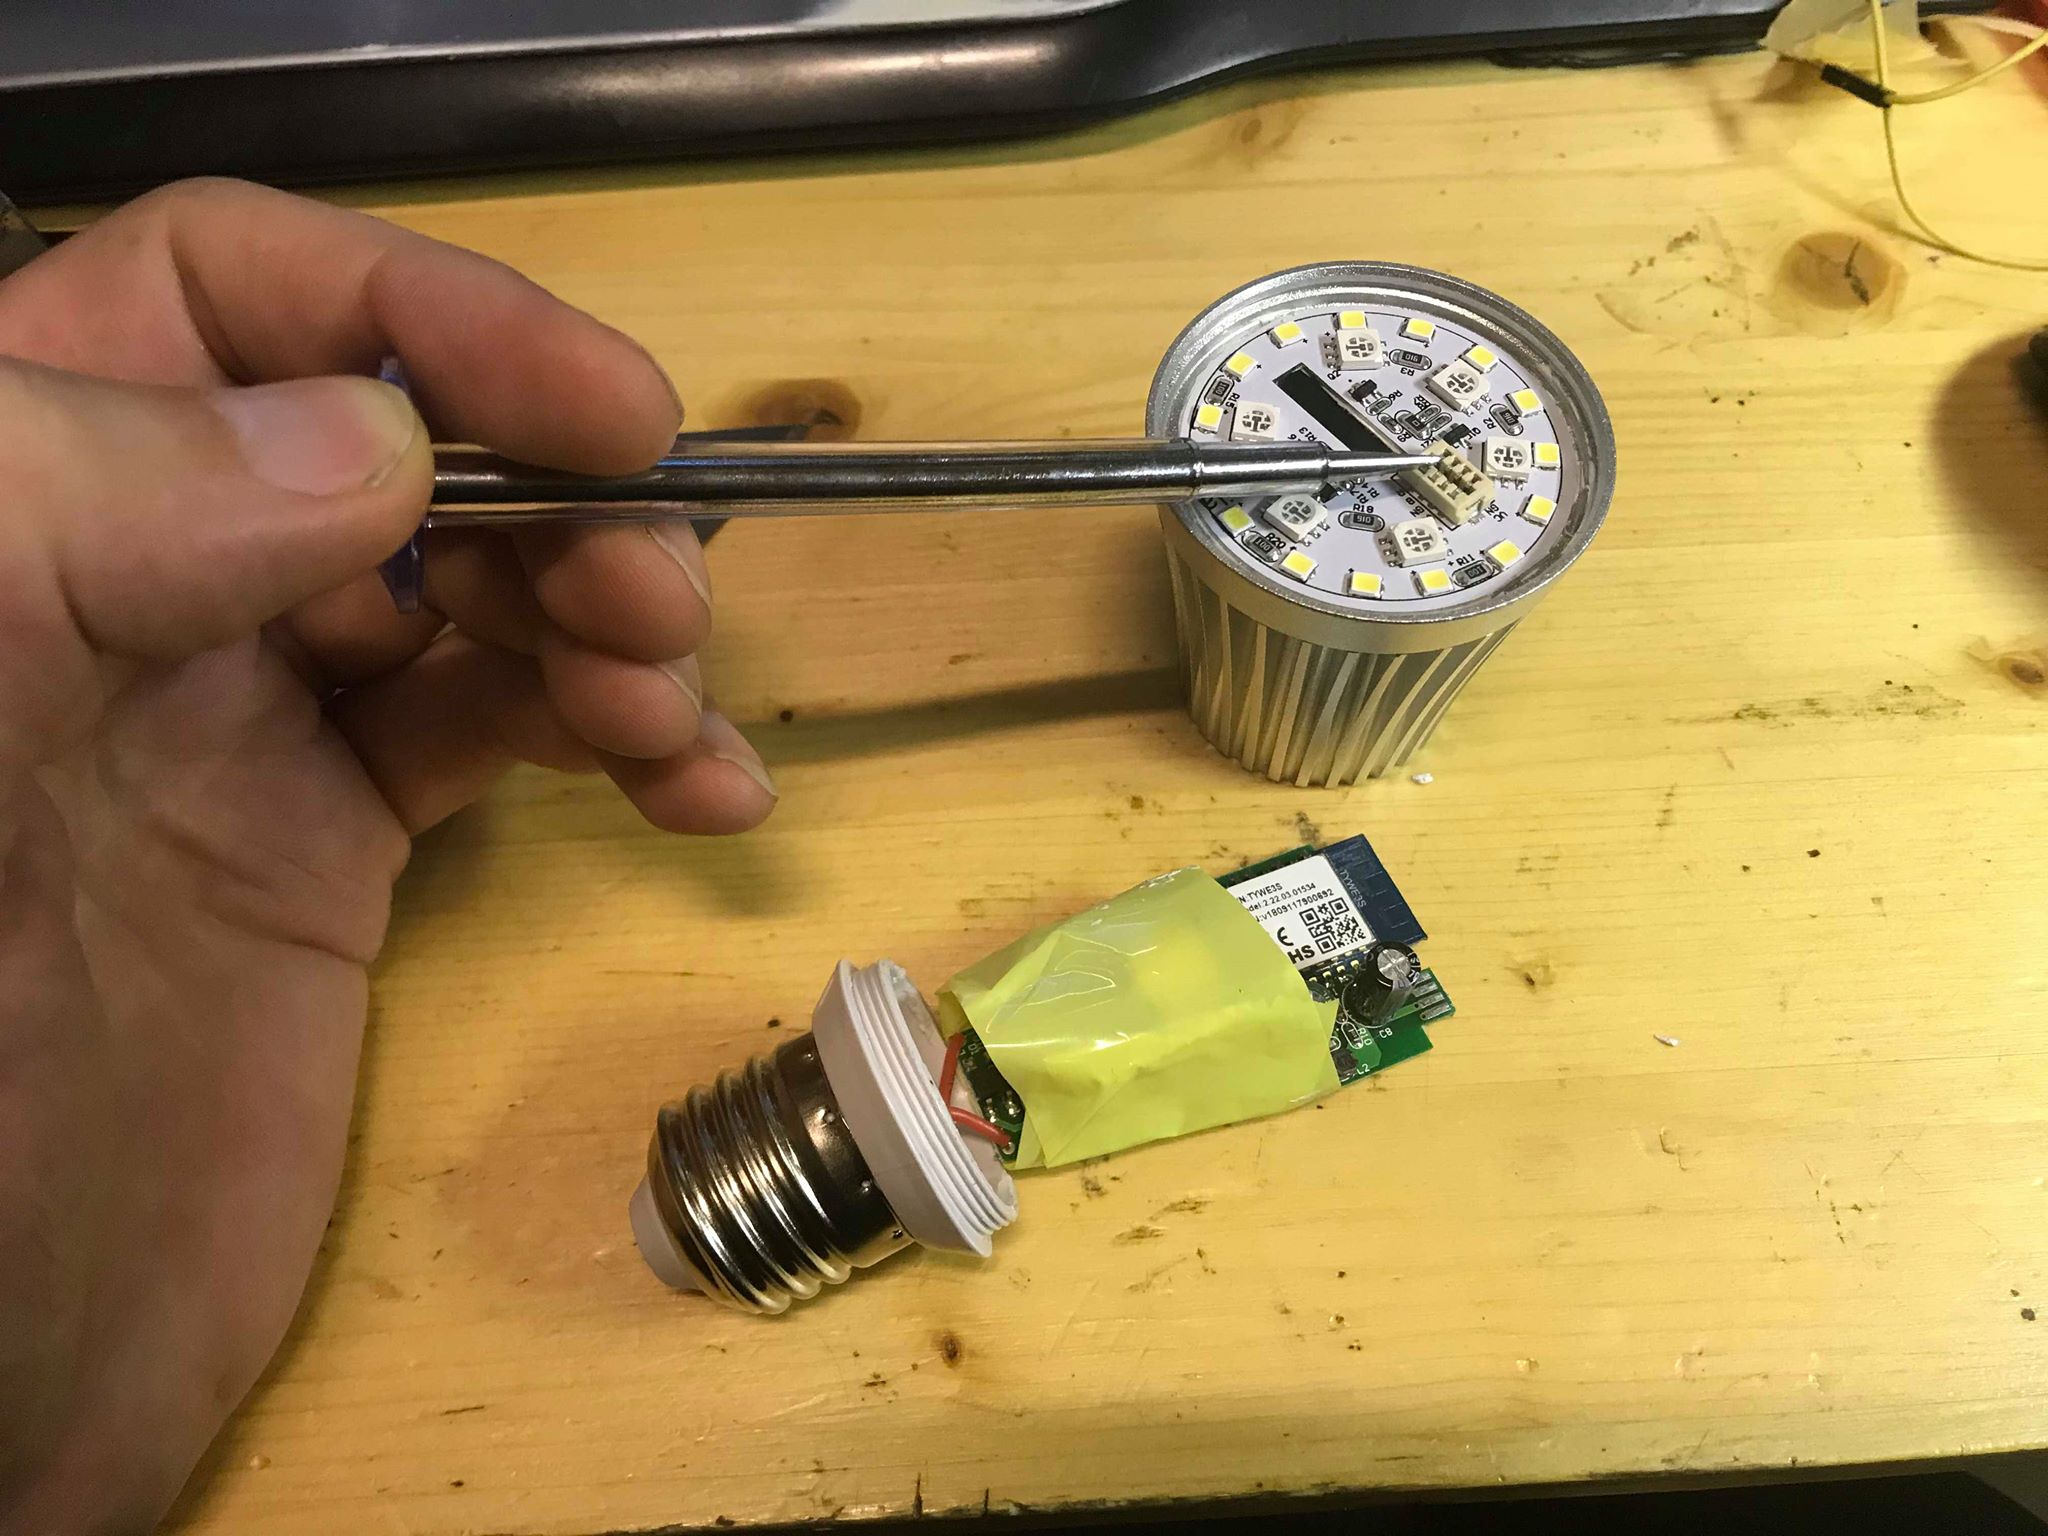
Electronics is held by the 8 pin "slide into" system. Push it out with flat wide screwdriver, gently. Dont damage the "legs".Now you have access to esp8266 legs and can solder on to upload your own sketch.
I have not tested yet if tasmota sonoff B1 profile works and things are wired the same way or not. I'll try after things are settled with seller.
No need to burn or destroy the top plate, leave it as it is
Quite interesting design. Too bad it doesnt have warm white leds. -
Thank you quite interesting explanation.
But iam wondering if the new ioy adapter, which is able to control WiFi related devices, would not already be able to control this bulb which would make the technical part and manipulation not needed anymore
Sent from my iPhone using Tapatalk
-
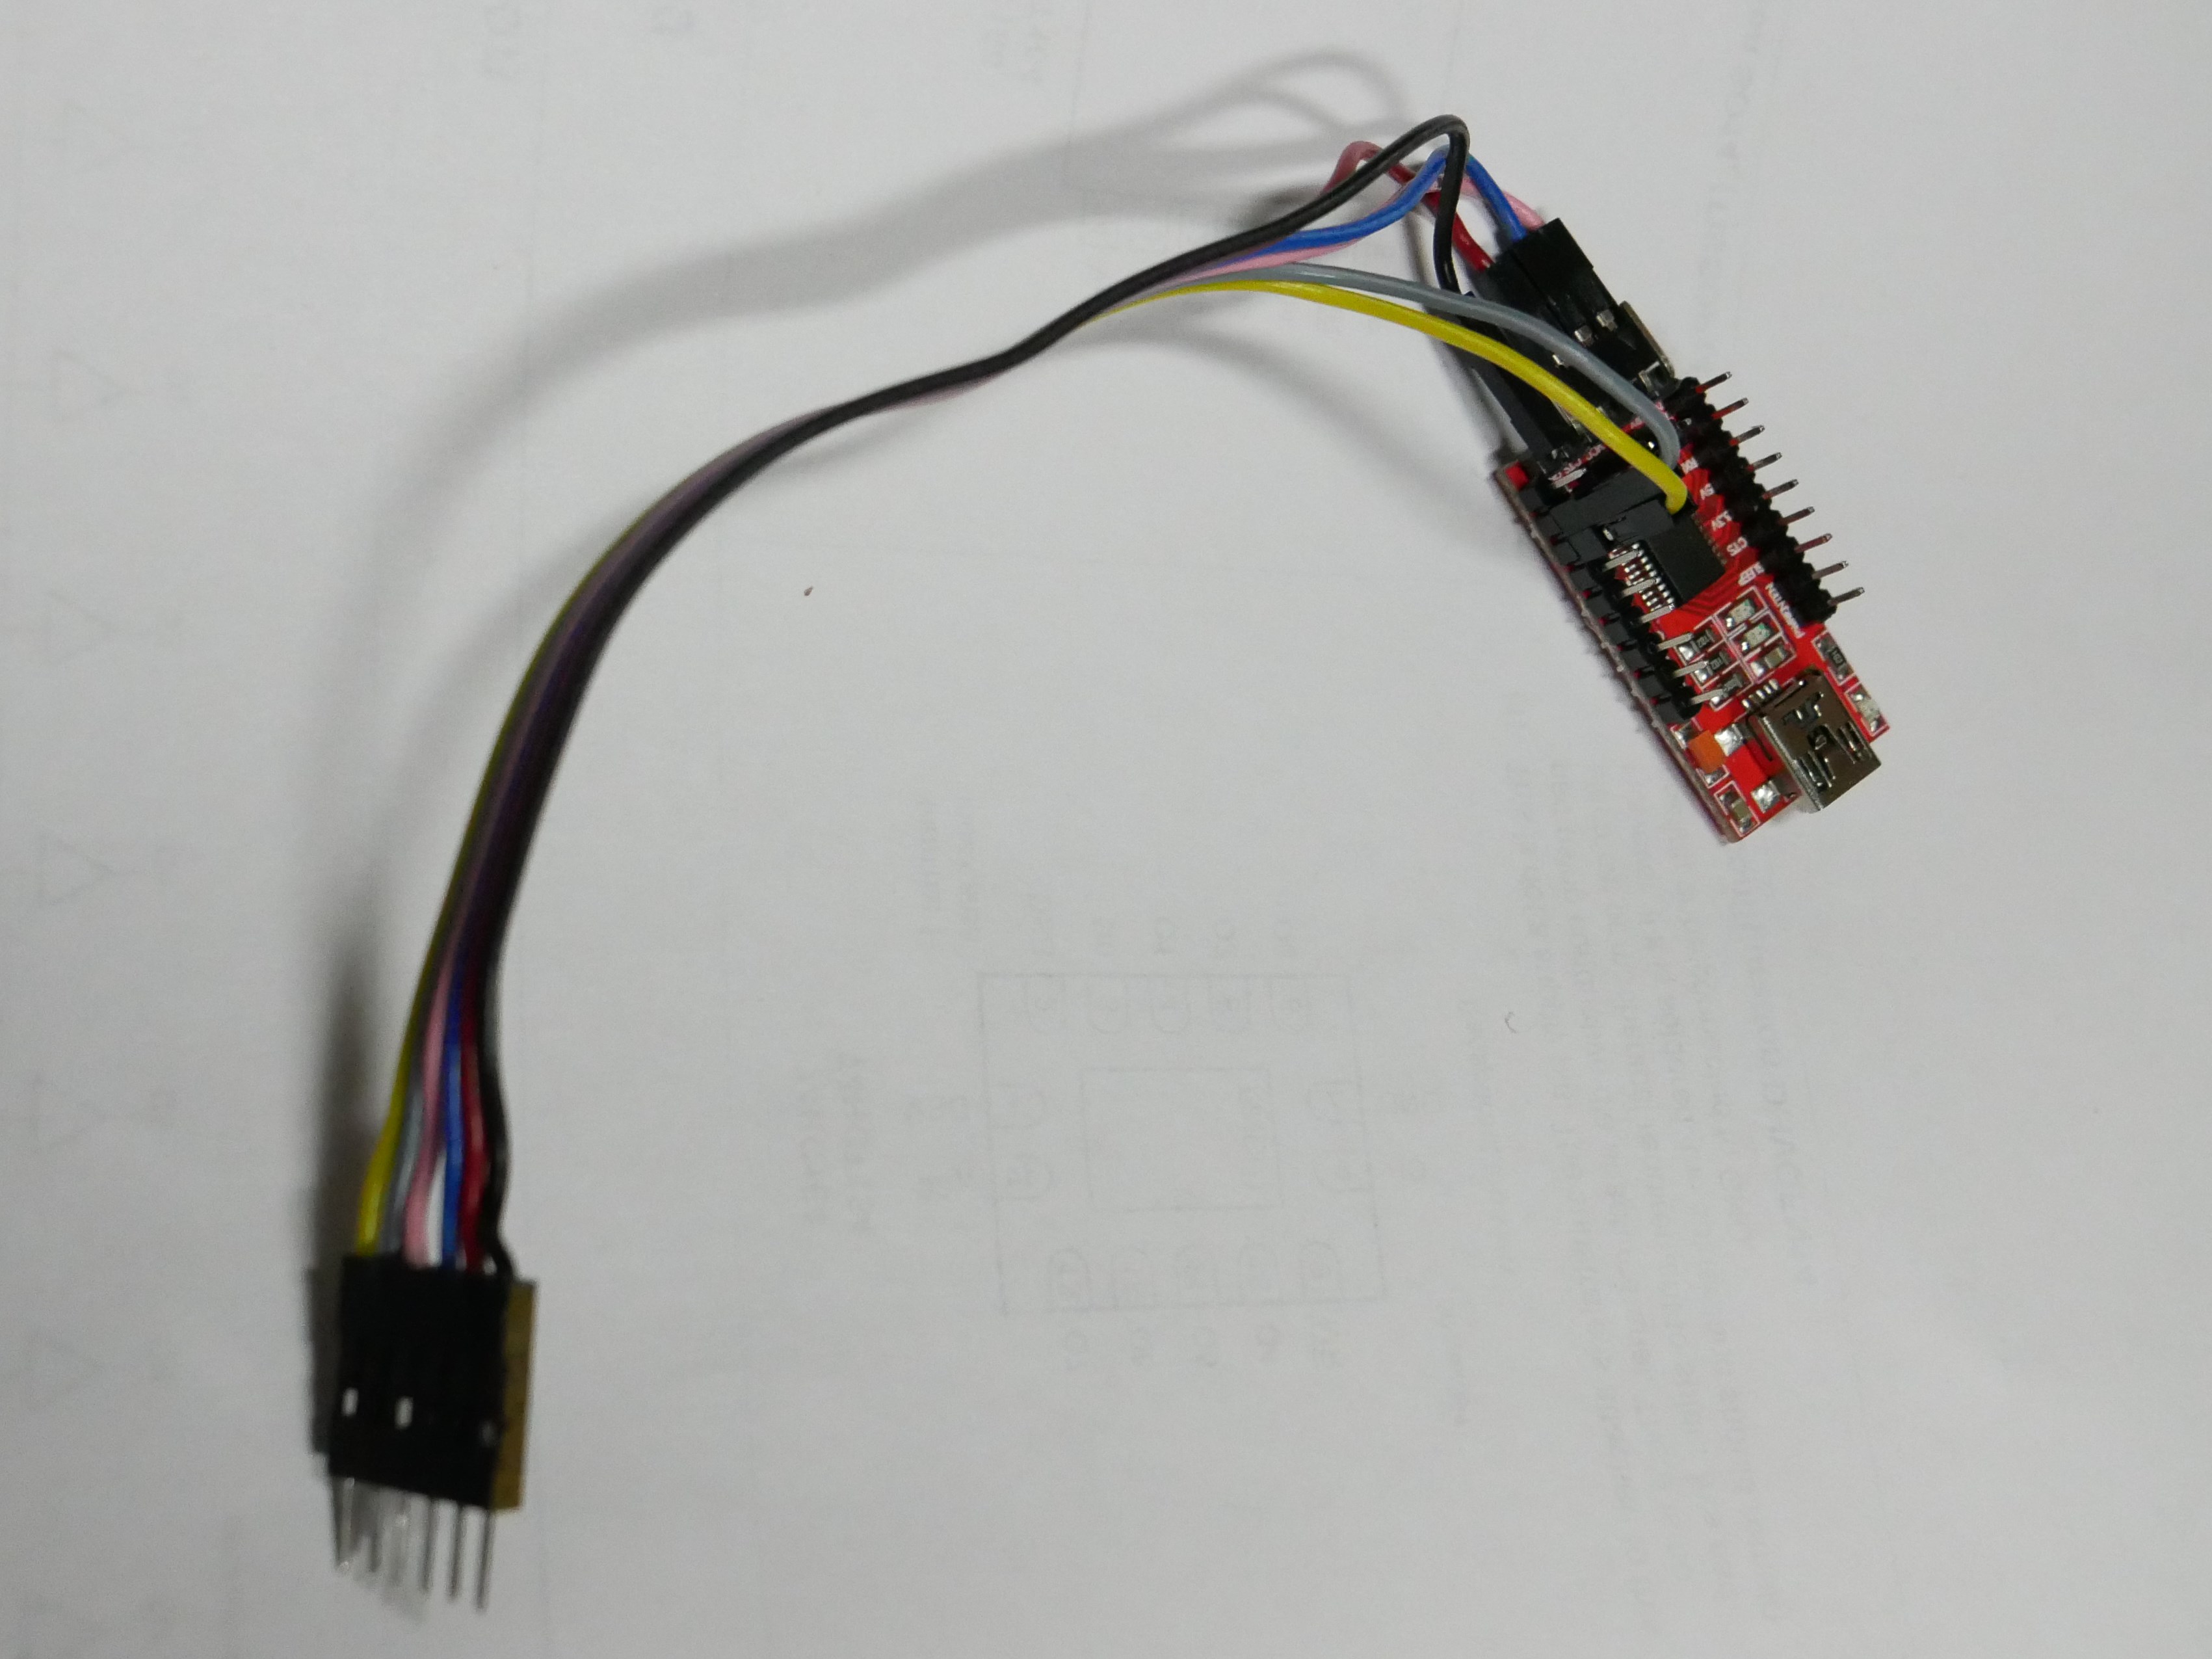
Sorry for late response. I get into the device a little bit after writing here, and afterwards forgot to answer. I ended up inserting a programming connector near the socket.
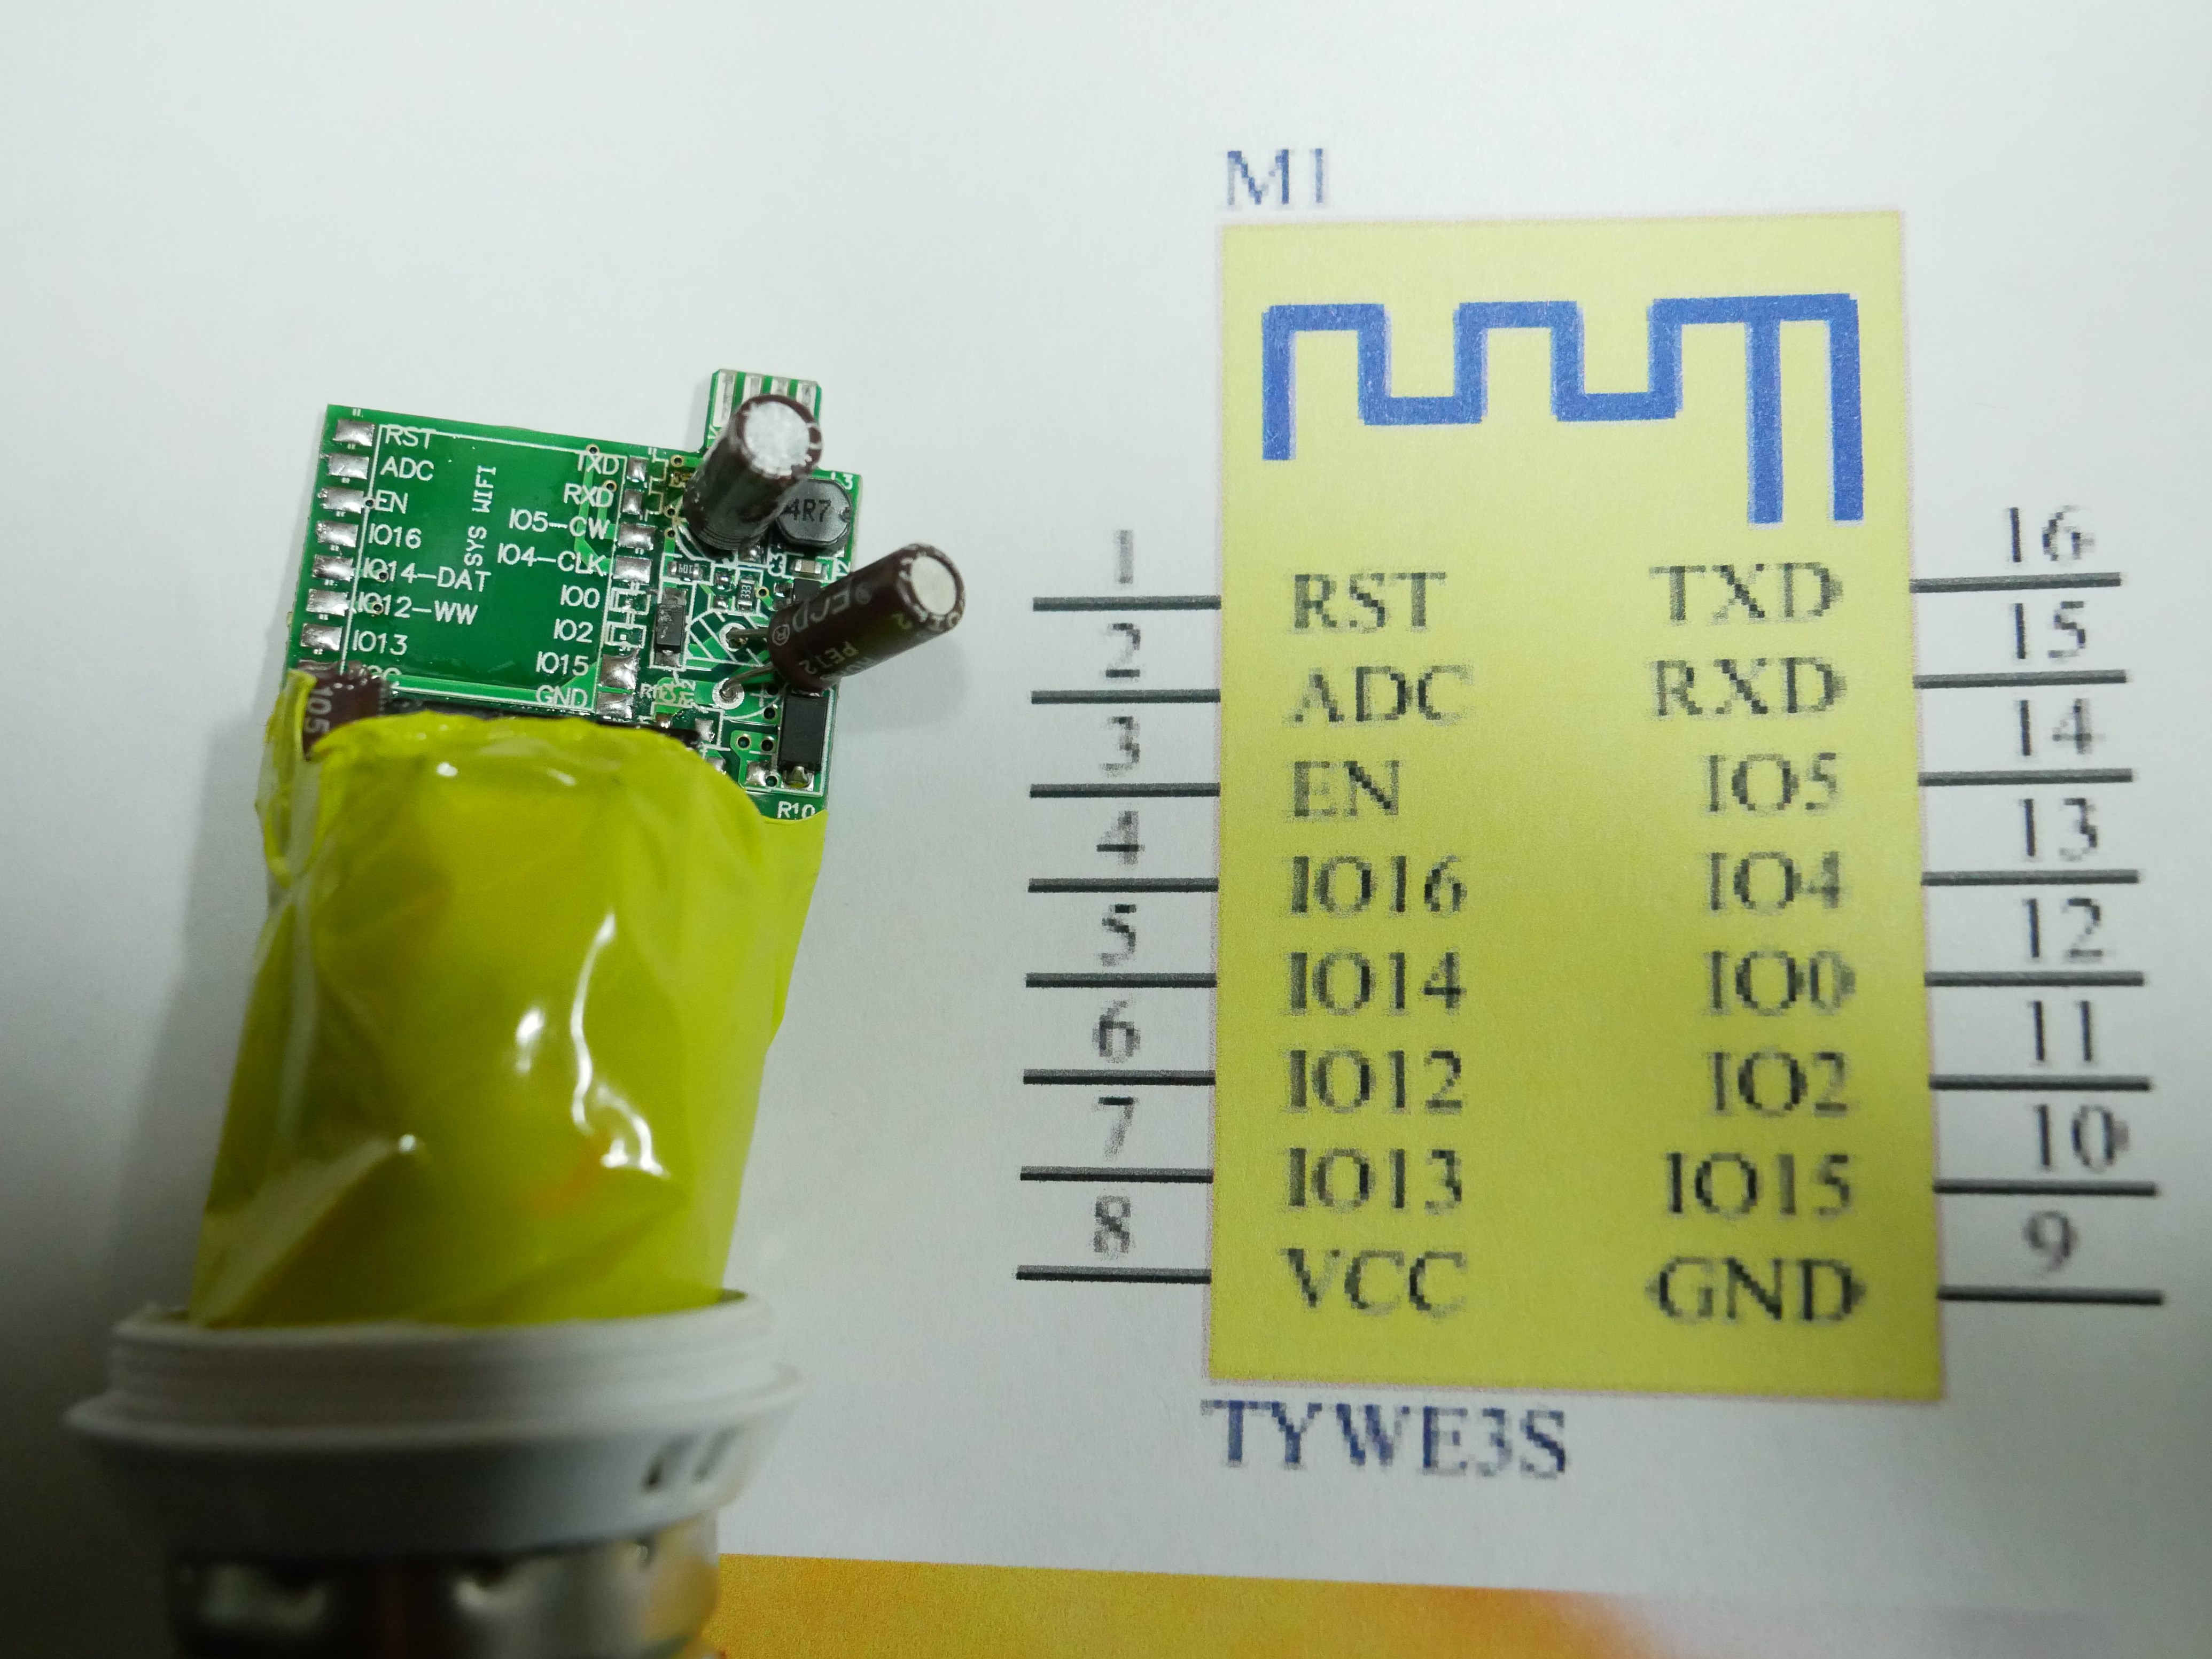
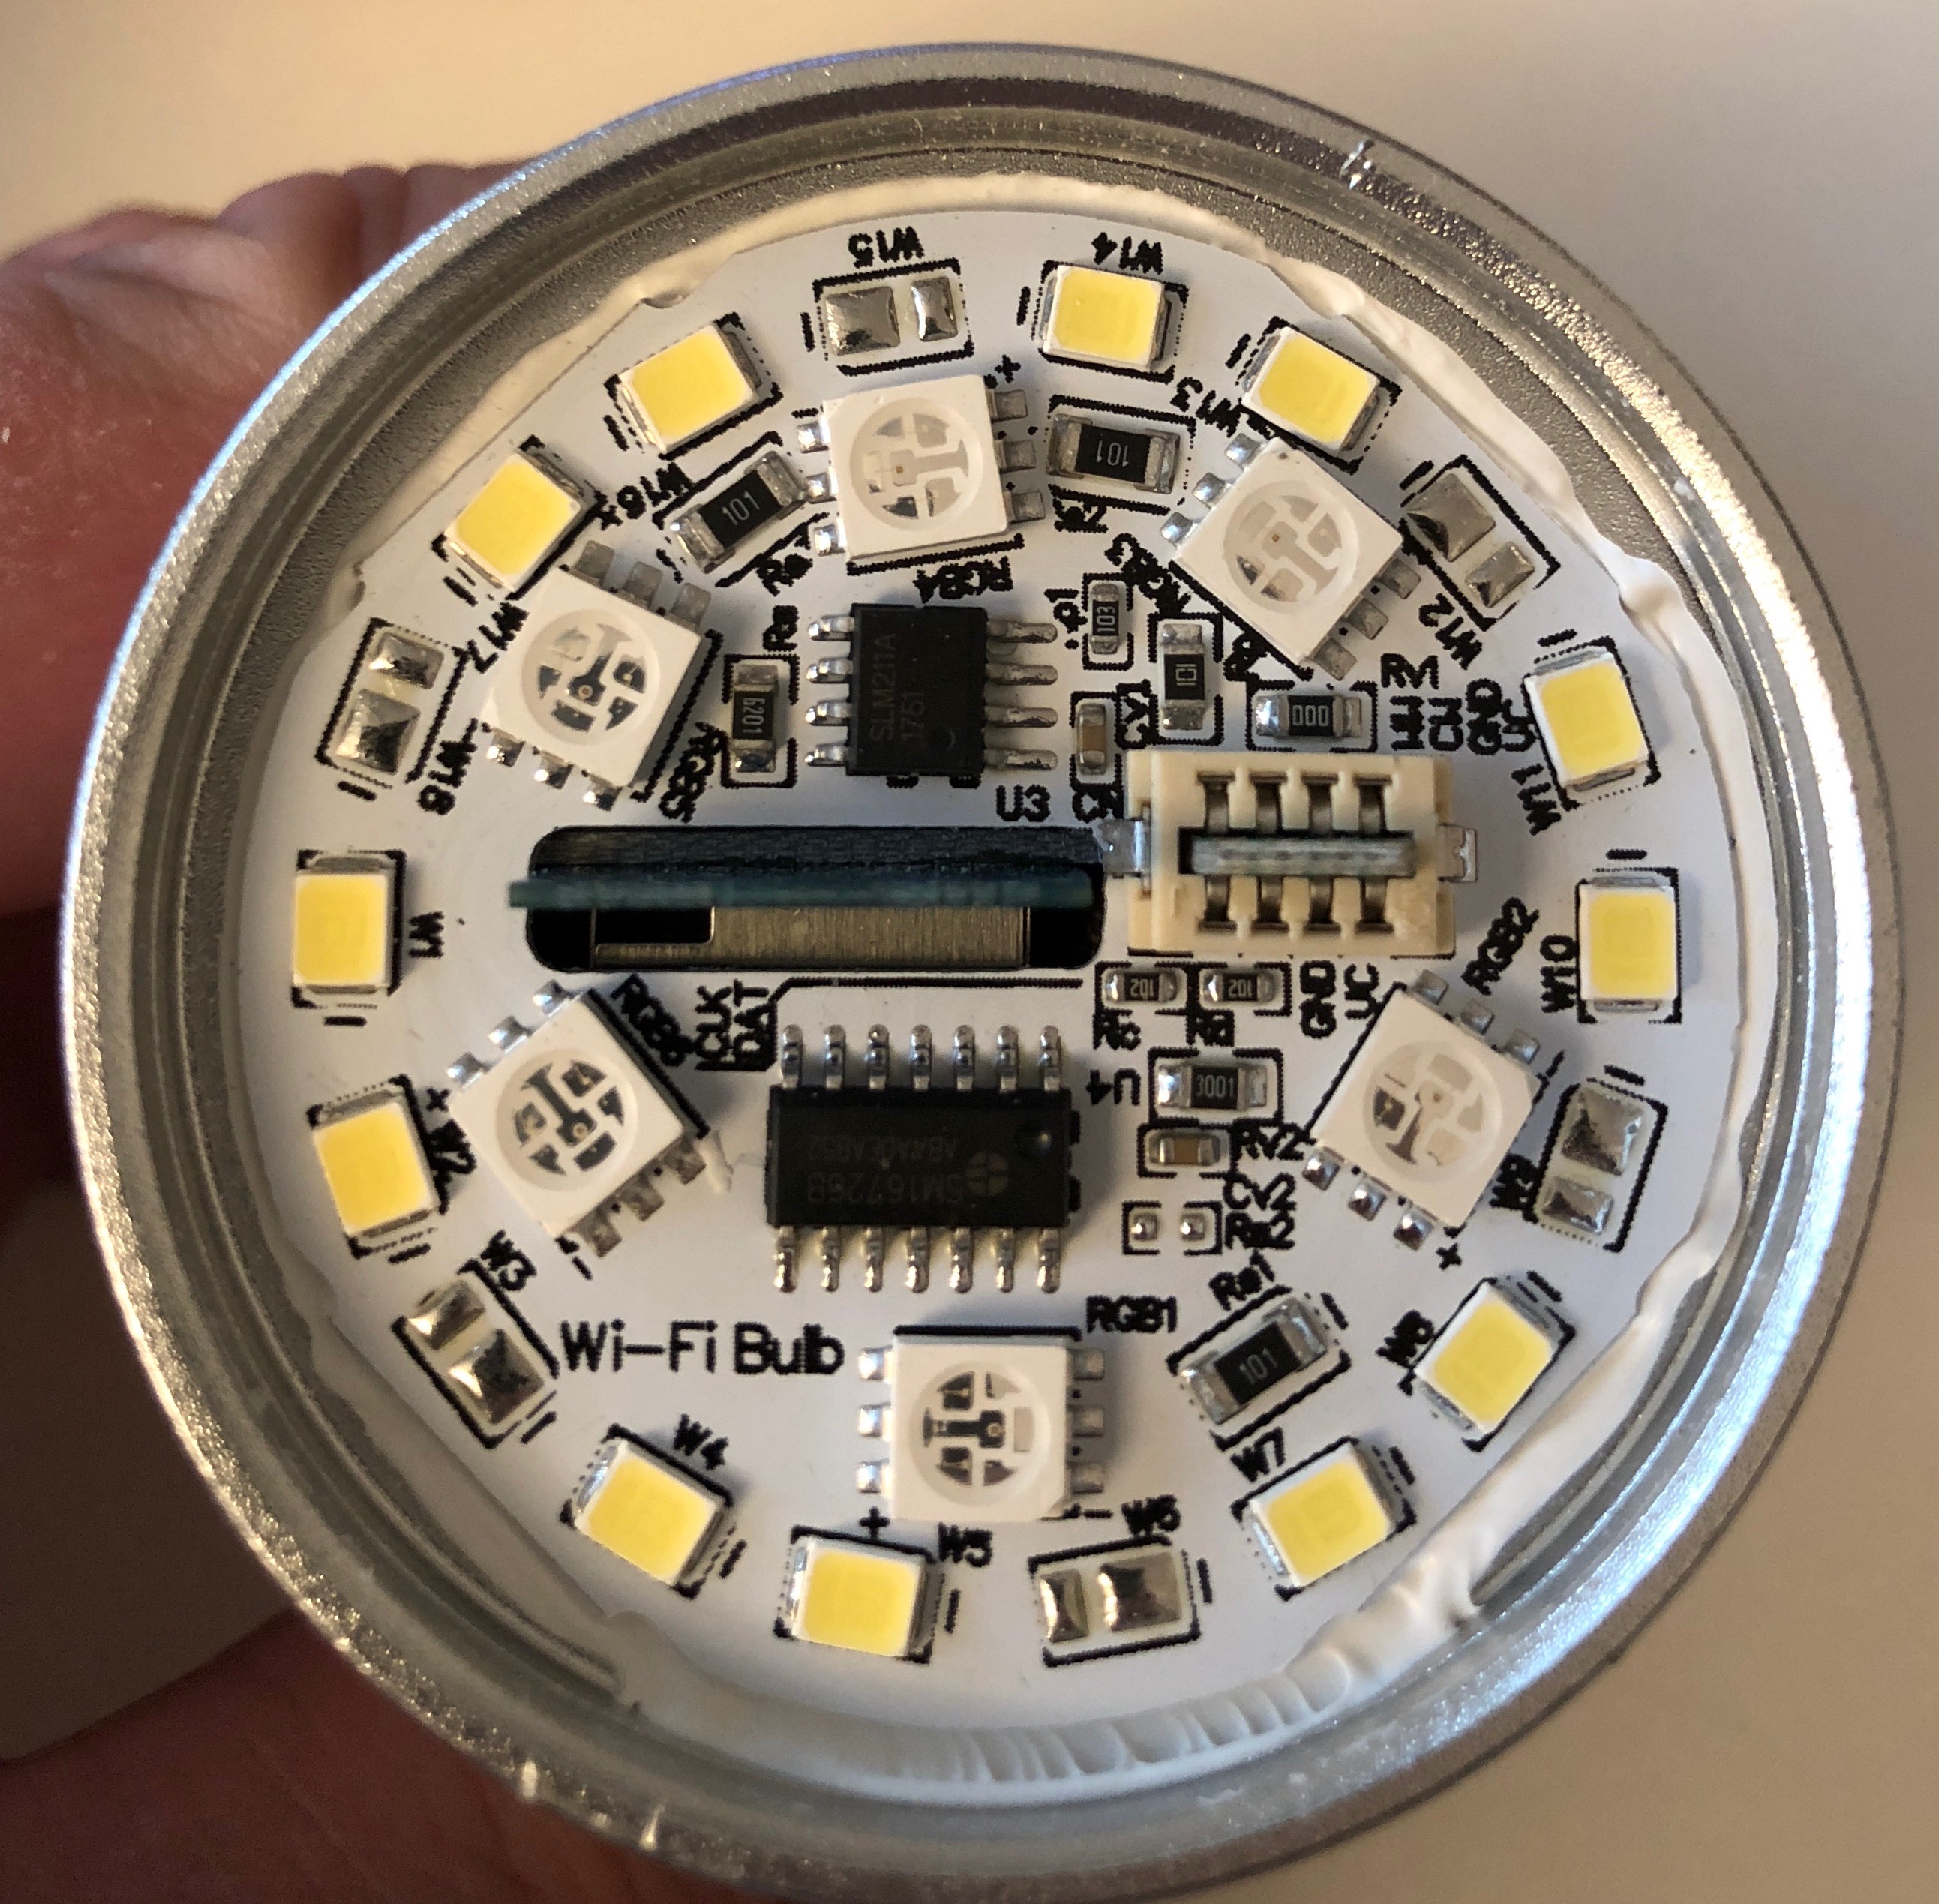
I have my own firmware based on https://github.com/SuperHouse/esp-open-rtos, utilizing webocket or mqtt to control the lamp. In the pictures below I also desoldered the ESP module. So you can also see the pin mapping if it is interesting for you.
RGB LED controller IC SM16726
	Pin3	OMODE = HI	- Internal constant current drive mode
	Pin14	SET = HI	- Without current gain adjustment

ESP:
	IO4	= CLK		- Connected to SM16726 RGB controller
	IO5	= CW 		- Connected to SLM211A PWM controller
	IO12	= WW		- Not distrbuted on LED board
	IO14	= DAT		- Connected to SM16726 RGB controller
PLEASE DO THIS MODIFICATION ONLY WHEN YOU KNOW WHAT YOU ARE DOING!!! THE MAINS VOLTAGE IN DEVICE IS HIGHLY DANGEROUS!