Navigation

    Logo
    • Register
    • Login
    • Search
    • Recent
    • Tags
    • Unread
    • Categories
    • Unreplied
    • Popular
    • GitHub
    • Docu
    • Hilfe
    1. Home
    2. Deutsch
    3. Skripten / Logik
    4. JavaScript
    5. HowTo: Zusatz-Programme fuer jarvis v3

    NEWS

    • Neuer Blog: Fotos und Eindrücke aus Solingen

    • ioBroker@Smart Living Forum Solingen, 14.06. - Agenda added

    • ioBroker goes Matter ... Matter Adapter in Stable

    HowTo: Zusatz-Programme fuer jarvis v3

    This topic has been deleted. Only users with topic management privileges can see it.
    • M
      MCU @intruder7 last edited by

      @intruder7 Dann bleibt nur noch setValue?

      I 2 Replies Last reply Reply Quote 0
      • I
        intruder7 @MCU last edited by

        @mcu genau und die scrollbars

        M 1 Reply Last reply Reply Quote 0
        • M
          MCU @intruder7 last edited by

          @intruder7 Bezgl der scrollbars, hast du eine Einstellung im CSS?

          I 1 Reply Last reply Reply Quote 0
          • I
            intruder7 @MCU last edited by

            @mcu initial nach nem reload sind sie da. minimiere ich das Fenster und maximiere ich es sind sie weg

            1 Reply Last reply Reply Quote 0
            • I
              intruder7 @MCU last edited by

              @mcu
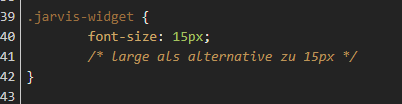
              dies ist alles was ich unter styles habe

              .MCU_HKT_History_Icon {
              	height: 20px!important;
              	width: 20px!important;
              }
              
              .blink {
              	animation: blinker 2s linear infinite;
              }
              
              @keyframes blinker {
              	50% {
              		opacity: 0;
              	}
              }
              
              .jarvis-StateList.horizontal {
              	display: flex;
              	min-width: fit-content;
              	justify-content: center;
              	padding: 10px;
              }
              
              .stacked .jarvis-StateListItem {
              	width: auto !important;
              }
              
              .jarvis-Calendar-CalendarName {
              	font-size: 15px;
              	margin-top: -6px;
              }
              
              .q-dialog .q-card {
              	max-width: 700px !important;
              	width: 700px !important;
              	color: #EEEEEE;
              	background-color: #000000c9 !important;
              }
              
              .jarvis-widget {
              	font-size: 15px;
              	/* large als alternative zu 15px */
              }
              
              .paper {
              	border-radius: 15px;
              }
              
              .jarvis-widget {
              	border-radius: 15px;
              }
              
              .jarvis-widget-container {
              	border-radius: 15px;
              	box-shadow: inset 4px 4px 9px #19212d,
                          inset -4px -4px 9px #253141;
              	color: rgba(255,255,255,.8);
              }
              
              .jarvis-DateTime-Clock-Date {
              	font-size: 30px;
              	/* entsprechende Größe eintragen */
              	color: red;
              	/* falls man die Farbe ändern möchte */
              }
              
              .jarvis-DateTime-Clock-Time {
              	font-size: 20px;
              	/* entsprechende Größe eintragen */
              	color: white;
              	/* falls man die Farbe ändern möchte */
              }
              
              .jarvis-page-container,
              .jarvis-sidebar-container,
              .jarvis-sidebar-container .q-toolbar,
              .jarvis-popup,
              .jarvis-popup .jarvis-StateList {
              	background-image: url("https://images.hdqwalls.com/download/black-gradient-b9-1920x1080.jpg");
              }
              
              .body--dark .jarvis-header {
              	background-color: rgba(0,0,0,0.25) !important;
              }
              
              .body--light .jarvis-header {
              	background-color: rgba(0,0,0,0.25) !important;
              }
              
              .jarvis-tabs-container {
              	background-color: rgba(0,0,0,0.25) !important;
              }
              
              .jarvis-widget-container {
              	background-color: rgba(0,0,0,0.25) !important;
              }
              
              .body--dark .jarvis-widget {
              	background: rgba(0,0,0,0.25);
              }
              
              .body--light .jarvis-widget {
              	background: rgba(0,0,0,0.25);
              }
              
              .body--dark .jarvis-tabs-container {
              	background-color: rgba(0,0,0,0.45) !important;
              }
              
              .body--light .jarvis-tabs-container {
              	background-color: rgba(0,0,0,0.45) !important;
              }
              
              /* für JsonTable ergänzt @mcu */
              
              .q-table__container,
              .q-card__section.q-card__section--vert {
              	background-color: transparent !important;
              }
              
              /*
              .q-card__section {
              	height: 100% !important;
              }
              */
              
              /* für Trennstrich für TABs ergänzt @mcu */
              
              .q-header--bordered {
              	border: 1px solid transparent !important;
              }
              
              /* transparents Icon im Widget-Header @mcu */
              
              .jarvis-widget-icon {
              	background: rgba(0,0,0,0.45);
              }
              
              /* MediaControl in transparentem Design @mcu */
              
              .cover {
              	background-color: transparent !important;
              }
              
              .controls {
              	background-color: transparent !important;
              }
              
              .track-information {
              	background: rgba(25, 118, 210, 0) !important;
              }
              
              .track-duration {
              	background-color: white;
              }
              
              .track-progress {
              	background-color: blue;
              }
              
              .controls .jarvis-icon svg {
              	color: white;
              }
              
              .controls .controlsLeft .q-btn__wrapper {
              	background-color: transparent !important;
              }
              
              .controls .q-btn-group >.q-btn-item {
              	background-color: transparent !important;
              }
              
              M 1 Reply Last reply Reply Quote 0
              • M
                MCU @intruder7 last edited by MCU

                @intruder7

                07068830-265b-4b18-add3-80061e090a99-image.png

                Das kann schon Einfluss haben, geht ja auch auf alle Widgets.

                Schalte einmal die Styles ab und schau ob es anders wird.

                Welcher Wert soll gesetzt werden bei setValue?

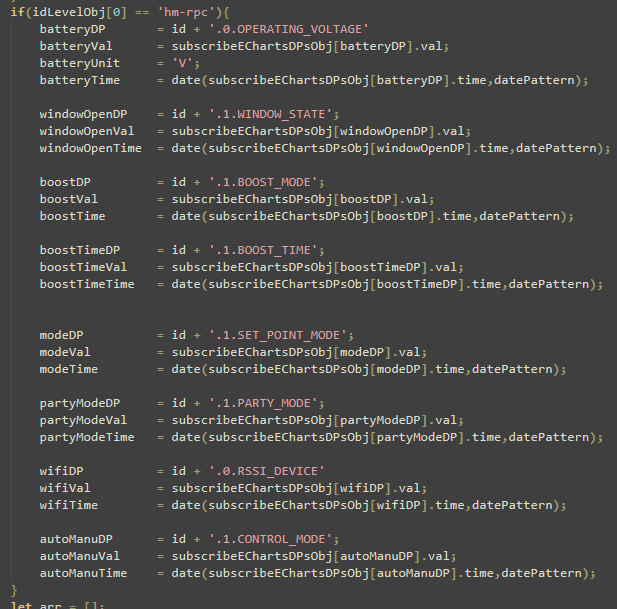
                Für hm-rpc sind die DPs gesetzt

                4ce0e7f9-734d-4df1-86bc-809852a37911-image.png

                So wurde es damals von einem User erklärt.

                I 3 Replies Last reply Reply Quote 0
                • I
                  intruder7 @MCU last edited by

                  @mcu
                  leider nicht
                  aeac9989-2687-427a-83fa-492ea11ee8fb-image.png

                  1 Reply Last reply Reply Quote 0
                  • I
                    intruder7 @MCU last edited by

                    @mcu
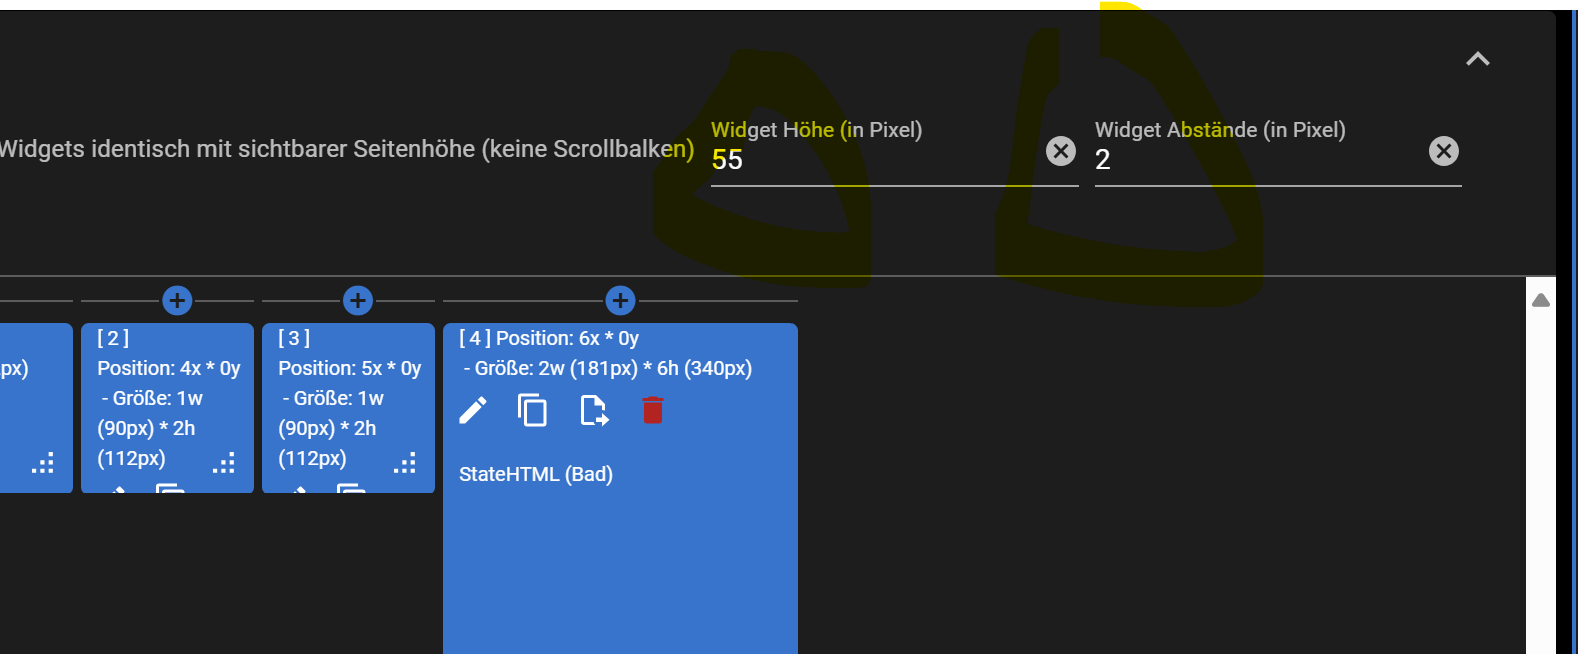
                    widget höhe von 50 auf 55 und Abstände von von 5 auf 2 hat geholfen
                    15c7a263-8b54-4eab-809d-1a4e622533ae-image.png

                    1 Reply Last reply Reply Quote 0
                    • I
                      intruder7 @MCU last edited by

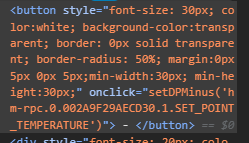
                      @mcu jetzt nur noch setvalue 😉

                      M 1 Reply Last reply Reply Quote 0
                      • M
                        MCU @intruder7 last edited by

                        @intruder7 Welcher DP muss gesetzt werden?

                        I 1 Reply Last reply Reply Quote 0
                        • I
                          intruder7 @MCU last edited by

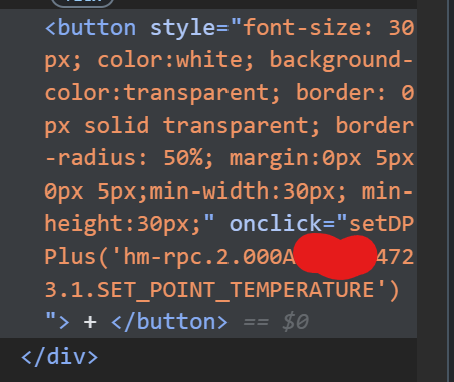
                          @mcu hm-rpc.2.000A97XXXXXX23.1.SET_POINT_TEMPERATURE

                          M 1 Reply Last reply Reply Quote 0
                          • M
                            MCU @intruder7 last edited by

                            @intruder7 Das ist der der über +/- gesetzt wird?

                            I 1 Reply Last reply Reply Quote 0
                            • I
                              intruder7 @MCU last edited by

                              @mcu jap

                              M 1 Reply Last reply Reply Quote 0
                              • M
                                MCU @intruder7 last edited by MCU

                                @intruder7 Klick mal rechte Maustaste auf - und danach auf + und "untersuchen"

                                154c2c5f-9df3-493d-b8ad-16349604bdd4-image.png

                                I 1 Reply Last reply Reply Quote 0
                                • I
                                  intruder7 @MCU last edited by

                                  @mcu
                                  d49a2971-705f-42ad-adc8-4d1d1fbd0fb5-image.png

                                  M 1 Reply Last reply Reply Quote 0
                                  • M
                                    MCU @intruder7 last edited by MCU

                                    @intruder7 Was kommt denn im DP an? Vorher 23 dann 22.5 oder bei Plus 23.5
                                    Was würde man manuell in den DP eingeben?

                                    I 1 Reply Last reply Reply Quote 0
                                    • I
                                      intruder7 @MCU last edited by

                                      @mcu Hab jetzt ein bisschen mit + und - probiert. Dies scheint ein sporadisches Problem beim Homematic Adapter zu sein. Die Werte kommen alles an am DP nur manchmal meckert der Adapter

                                      M 1 Reply Last reply Reply Quote 0
                                      • M
                                        MCU @intruder7 last edited by

                                        @intruder7 ok, dann sind wir erstmal fertig.

                                        Bernd1967 1 Reply Last reply Reply Quote 1
                                        • Bernd1967
                                          Bernd1967 @MCU last edited by

                                          @mcu
                                          Nur zur Info.
                                          Thema Zusatzprogramm eChartsChange:
                                          Bei der echart Adapter Version >2.0.4 kann es in deinem script zum Fehler in folgender Zeile kommen:

                                          if (eChartobj.native.data.lines[0].xticks == undefined)

                                          Das liegt daran das in den Objektdaten der Preset statt "lines" nur "l" benutzt wurde.
                                          Soll aber wieder korrigiert werden.
                                          Preset Objektdaten Problem #779

                                          1 Reply Last reply Reply Quote 1
                                          • D
                                            der-eine @MCU last edited by

                                            @mcu hab ich wohl übersehen...

                                            Bin jetzt das ganze durchgegangen.

                                            • eChartsHistoryGetData
                                            let logging         = false;
                                            let loggingData     = false;
                                            let dataLimitValue  = 300;  // 300 normal , je höher man diesen Wert einstellt -> Performance und Datenverbrauch für Handy beachten
                                            let standardHistory = 'influxdb.0'; // Hier muss man sein History-Adapter eintragen z.B. sql.0, influxdb.0
                                            let historyGetData  = '0_userdata.0.historyGetData';
                                            let queryDPsDP      = historyGetData + '.queryDPs';
                                            let queryJSONDP     = historyGetData + '.queryJSON'; // dp, type, cnt,start, end, adapt 
                                            let dataResultDP    = historyGetData + '.dataResult';
                                            let dataTypeDP      = historyGetData + '.type'; // queryJSON
                                            let dataCntDP       = historyGetData + '.dataCnt'; // queryJSON
                                            let timeFromDP      = historyGetData + '.timeFrom'; // queryJSON
                                            let timeToDP        = historyGetData + '.timeTo'; // queryJSON
                                            let historyAdaptDP  = historyGetData + '.historyAdapter'; // Auswahl der vorhandenen, queryJSON
                                            let getDataDP       = historyAdaptDP + '.getData';
                                            

                                            historyGetData so richtig?

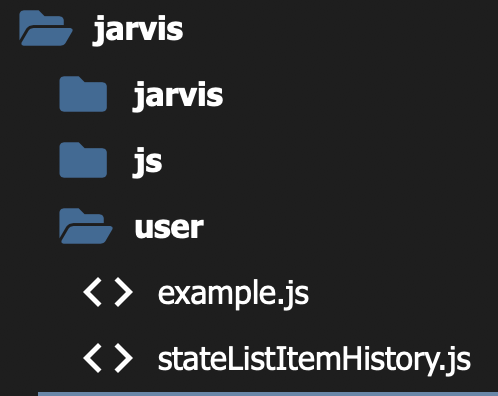
                                            • stateListItemHistory
                                            let instance 					= '0'; // auslesen aus Adresse erst ab v3.2
                                            let historyStandard             = 'influxdb.0';
                                            let loggingItemHistory          = false;
                                            let changeCntTimeAreaDP         = '0_userdata.0.Variablen.Jarvis.HomekitTile.trvWzBatTimeArea'; // Zeitbereichsänderung in festgelegter Einheit
                                            let absolutePercent 			= false; // false = relative -> 100% dataMin bis dataMax , true: absolute -> 100% = dataMax, 0% = 0
                                            let areaStyleActive				= true; // nur für Kurven mit einer Farbe
                                            let areaStandardColor			= 'grey';
                                            let areaColorGradient			= false;  // false -> areaStandardColor: colorDefaultJSON , true -> Color aus colors 
                                            
                                            let slHistoryWidgets = [
                                            						
                                            						{
                                            							widgetId: 'f4bfb3a6-0783-4252-80e0-fc247f18ed80', 
                                            							item: 0,
                                            							dpForHistory: 'shelly.0.SHTRV-01#60A423D91058#1.bat.value', // auto prüft automatisch ob es zum item aus dem Widget ein HistoryDP gibt und holt sich die Daten
                                            												  // ansonsten muss man den Geräte-DP angeben
                                            							popup: true, 			// true -> Popup wird angezeigt, false -> Umschaltung Anzeige Werte (Standard)
                                            							timeArea : 30, // Anzahl
                                            							timeAreaUnit: 'd', // m min, h hours, d days, 
                                            							colors: colorFuelJSON,
                                            							historyDB: 'influxdb.0'
                                            							
                                            						},
                                            						
                                            						/*
                                            

                                            widgetId eingetragen den Rest der Widgets auskommentiert.

                                            • Datei hochgeladen
                                              Bildschirmfoto 2025-02-03 um 22.36.02.png

                                            • Importvariante
                                              Bildschirmfoto 2025-02-03 um 22.38.04.png
                                              iP Adresse vom iobroker
                                              iob jarvis upload durchgeführt
                                              Muss iobroker auf https umgestellt sein?

                                            Siehst Du hier noch einen Fehler wieso es nicht funktionieren könnte?

                                            M 1 Reply Last reply Reply Quote 0
                                            • First post
                                              Last post

                                            Support us

                                            ioBroker
                                            Community Adapters
                                            Donate

                                            936
                                            Online

                                            31.9k
                                            Users

                                            80.1k
                                            Topics

                                            1.3m
                                            Posts

                                            javascript
                                            31
                                            864
                                            173890
                                            Loading More Posts
                                            • Oldest to Newest
                                            • Newest to Oldest
                                            • Most Votes
                                            Reply
                                            • Reply as topic
                                            Log in to reply
                                            Community
                                            Impressum | Datenschutz-Bestimmungen | Nutzungsbedingungen
                                            The ioBroker Community 2014-2023
                                            logo